Creating a GroupShare
From the My Documents Tab
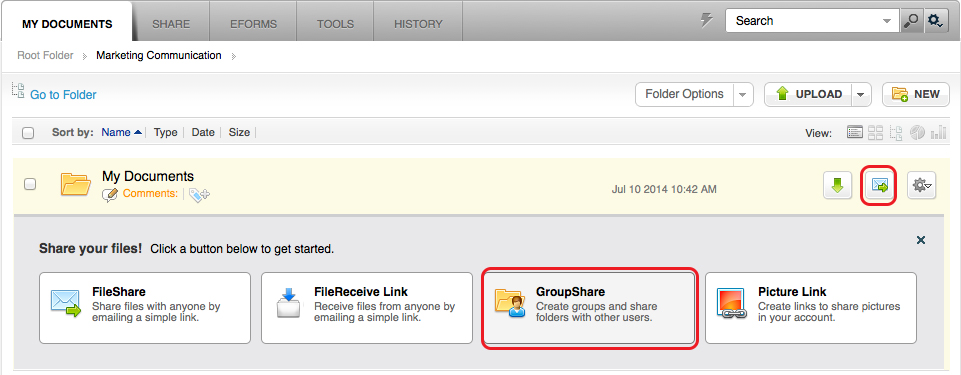
1. Select a method from the list below:
List View
Click the mail icon with a small green arrow as shown in red below. Click the GroupShare tab that appears below.
Icon View
Hover over a folder icon and click the downward facing arrow that appears in the top right hand corner. Scroll down to Send/Share, and select GroupShare.

Tree View
Right click on a folder, scroll down to Send/Share and click Group Share.

Chart/Bar View
Click the Folder Options menu, scroll down to Send/Share, and click Group Share.

From the Share Tab
Open the Share Tab and click Create GroupShare

2. Click the Search Folder icon circled in red below to select a folder to GroupShare.

3. Select a folder from the list in the window that appears and click OK.

4. Click the Contacts icon circled in red below to select user(s) to send a GroupShare.

5. Check the empty box next to all user(s) you wish to add to the GroupShare list, then Click Add Selected Users & Close.

6. Select a permission level for the user(s).

Full Access – User has full access to GroupShare; FileShare and GroupSharing not allowed
Create and Update – User only has create and update privileges; deletion is restricted
Read Only – User may only view files
Master Access – User has equal access to folder as owner; FileShare and GroupSharing allowed
7. Click Add User/Group to send the GroupShare, then click Close.
0 Comments